

Okay, friends, gather ’round! Because I’m about to spill the secrets to my absolute *favorite* little dessert: **Mini Lemon Tarts with Lilac Meringue**. Seriously, these are showstoppers, and they’re way easier than they look! Picture this: a tangy, sunshine-y lemon curd nestled in a buttery, crispy shell, all topped with the most dreamy, pastel lilac meringue you’ve ever seen. It’s like a tiny, edible work of art. I started making these for my daughter’s tea parties, and now everyone begs me to bring them to every gathering! Trust me, these are gonna become your go-to dessert for any occasion.
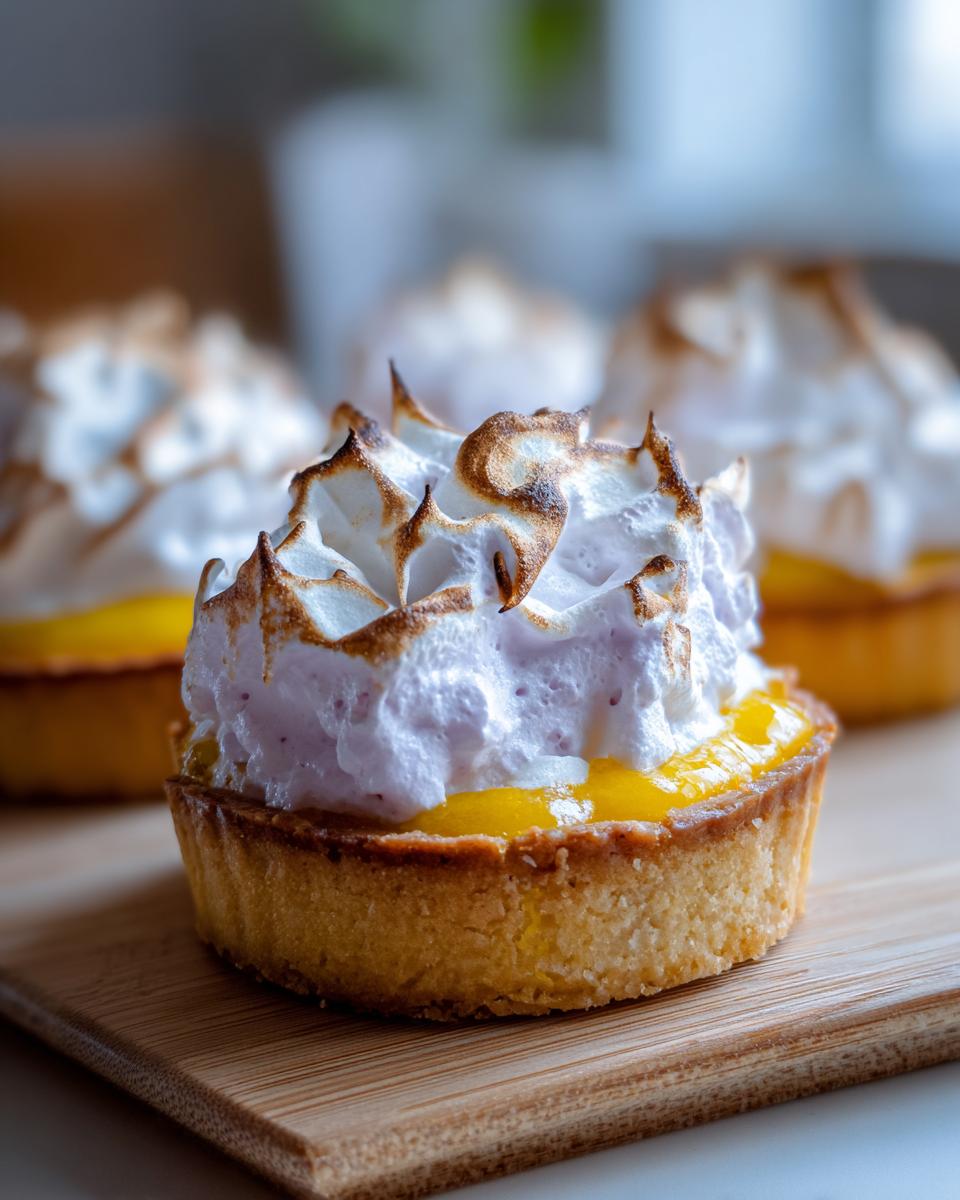
Why You’ll Love These *Mini Lemon Tarts with Lilac Meringue*
Honestly? Where do I even *start*? These little tarts are pure magic, and here’s why you’ll become obsessed, too:
- They’re surprisingly simple! I swear, even if you’re a beginner baker, you can totally nail these. No complicated techniques here!
- That *lilac* meringue! Seriously, it’s just so pretty, and it makes everyone go “Ooooh!” It’s the perfect fancy touch.
- The lemon curd is *divine*. It’s tangy, sweet, and perfectly balanced. You can even use store-bought, so it’s extra easy.
- They’re the perfect portion size. Mini desserts are the best, right? You get a little taste of heaven without feeling guilty.
- They’re a total crowd-pleaser. Seriously, I’ve never met anyone who didn’t love these! They’re great for parties, showers, or just a little treat for yourself.
- You can make them ahead! Prep the curd and shells, and then whip up the meringue right before serving. Easy peasy!
- They’re *so* versatile! Change up the color of the meringue, add some berries… the possibilities are endless!
Ingredients You’ll Need for *Mini Lemon Tart with Lilac Meringue*
Alright, so here’s the shopping list! Don’t worry, it’s short and sweet. You probably have half of this stuff already!
- Mini Tart Shells: 1 package of those pre-made ones. You know, the kind you find in the bakery section? Makes life SO easy!
- Lemon Curd: 1 cup. You can totally make your own (I’ll give you a link for that later!), but honestly, store-bought is great here. Saves time!
- Egg Whites: 3 large. Make sure there’s NO yolk in there, or your meringue won’t be as fluffy.
- Granulated Sugar: 1/2 cup. Just regular ol’ white sugar.
- Cream of Tartar: 1/4 teaspoon. This is the secret weapon for stiff, stable meringue. Don’t skip it!
- Purple Gel Food Coloring: A few drops, or however much it takes to reach your perfect shade of lilac. Gel is best because it won’t make your meringue too runny.
And that’s it! See? Told you it was easy peasy!
Equipment Required for the Recipe
Okay, so before you get started with these *Mini Lemon Tarts*, let’s make sure you have everything you need. You don’t want to get halfway through and realize you’re missing something, trust me, I’ve *been* there! Here’s what you’ll need:
- Baking Sheet: For those mini tart shells!
- Mixing Bowls: At least two, one for the egg whites and one for mixing the lemon curd (if you’re making your own).
- Electric Mixer (or Whisk): You *can* whisk the meringue by hand, but trust me, an electric mixer is your best friend here. Saves your arm!
- Spatula or Spoon: For gently folding in the food coloring and for filling the tart shells.
- Oven: Obviously! Make sure yours is working properly.
- Piping Bag and Tip (Optional): If you want those fancy swirls on top of your meringue. Otherwise, a spoon works just fine!
- Measuring Cups and Spoons: Accurate measuring is key for baking!
That’s it! Pretty simple stuff. Now you’re ready to get baking!
Step-by-Step Instructions: Making the Perfect *Mini Lemon Tart with Lilac Meringue*
Alright, let’s get down to the fun part! Here’s how to make these gorgeous *Mini Lemon Tarts*. Don’t worry, I’ll walk you through it, step-by-step. You got this!
Preparing the Tart Shells
Okay, so first things first: the tart shells! Since we’re using pre-made shells (yay for saving time!), this part is super easy. Just take your package of mini tart shells and arrange them on a baking sheet. That’s it! Seriously, that’s the whole step. Easy, right?
Making the Lemon Curd
Next up: the lemon curd. If you’re feeling ambitious and want to make your own, go for it! Here’s a quick recipe (but honestly, store-bought is totally fine!):
- Whisk together 1/2 cup sugar, 2 large eggs, and 2 egg yolks in a heatproof bowl.
- Whisk in 1/2 cup lemon juice and 2 tablespoons of lemon zest.
- Set the bowl over a saucepan of simmering water (make sure the bowl doesn’t touch the water!).
- Whisk constantly until the curd thickens enough to coat the back of a spoon (about 8-10 minutes).
- Remove from heat, and whisk in 4 tablespoons of cold butter, piece by piece, until melted.
- Strain the curd through a fine-mesh sieve into a bowl to remove any lumps.
- Press plastic wrap directly onto the surface of the curd to prevent a skin from forming.
- Chill for at least 2 hours.
If you’re using store-bought, just grab your favorite lemon curd from the store! Now, fill each of your mini tart shells with the lemon curd. Don’t overfill them – you want room for that gorgeous meringue!
Creating the Lilac Meringue
Okay, this is where the magic happens! The meringue is what takes these *Mini Lemon Tarts* from “cute” to “WOW!” Here’s how to do it:
- Preheat your oven to 350°F (175°C). Don’t forget this step!
- Get your egg whites ready. Make sure your bowl and whisk are super clean and grease-free. Any trace of grease will prevent your meringue from whipping up properly.
- Whip those egg whites! In a clean bowl, use an electric mixer to beat your egg whites and cream of tartar until soft peaks form. You’ll know they’re ready when the whisk leaves a trail in the egg whites that slowly disappears.
- Add the sugar, *slowly*. With the mixer running, gradually add the granulated sugar, a tablespoon at a time. Keep beating until the meringue is stiff and glossy. It should hold stiff peaks, meaning when you lift the whisk, the meringue stands straight up and doesn’t droop.
- Color it pretty! Gently fold in your purple gel food coloring. Start with a few drops and add more until you get your desired shade of lilac. Be careful not to overmix, or you’ll deflate the meringue.
Baking and Assembling the *Mini Lemon Tart with Lilac Meringue*
Almost there! Now, let’s put it all together. Here’s how to finish these beauties:
- Get your meringue ready! Spoon or pipe the lilac meringue onto the lemon curd-filled tart shells. You can make swirls, peaks, or whatever design you like!
- Bake! Pop the baking sheet into your preheated oven and bake for 8-10 minutes, or until the meringue is lightly golden brown. Keep a close eye on them, as they can burn quickly!
- Cool and admire! Let the *Mini Lemon Tarts* cool completely before serving. This is important, so the meringue sets properly.
- Serve and enjoy! Once they’re cool, you can dig in! These are best served fresh, but you can store them in the fridge (more on that later!).
Ta-da! You did it! Now, go ahead and pat yourself on the back. You’ve just made some seriously impressive *Mini Lemon Tarts with Lilac Meringue*!
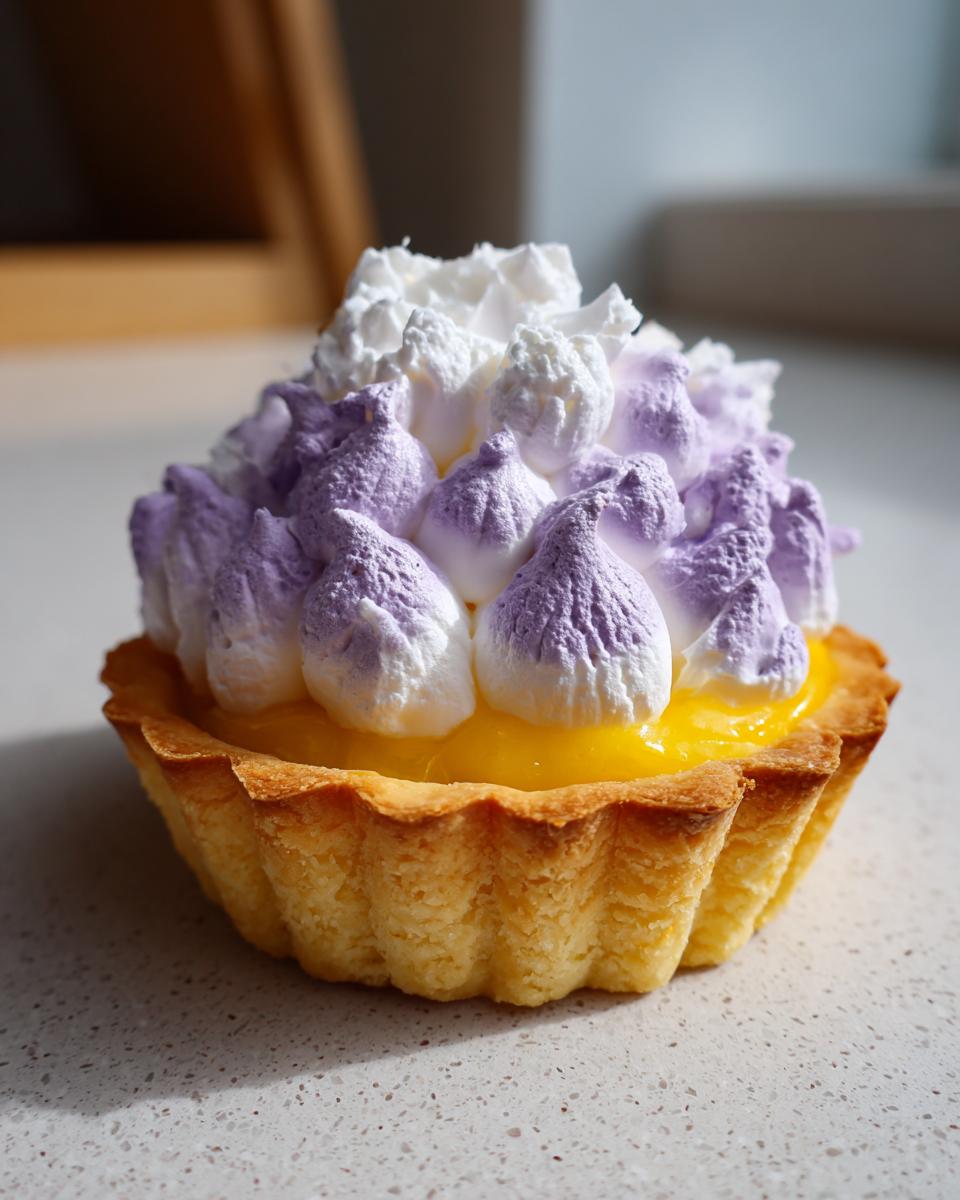
Tips for Success: Achieving Meringue Perfection for Your *Mini Lemon Tarts*
Okay, so you’ve made the meringue, and now you want it to be *perfect*, right? Trust me, I get it! Here are a few little tricks I’ve learned over the years to help you get the most gorgeous, fluffy, and stable meringue for your *Mini Lemon Tarts*:
- Cleanliness is key! Seriously, the most important thing is a super clean bowl and whisk. Any trace of grease or yolk will prevent your egg whites from whipping up properly. I usually wipe down my bowl and whisk with a little bit of lemon juice or vinegar to be extra sure!
- Room temperature eggs are your friends. They whip up to a higher volume than cold eggs. Just separate them carefully!
- Don’t overbeat! You want stiff, glossy peaks, but don’t keep whipping once you get there. Overbeating can make the meringue dry and grainy.
- Add the sugar slowly. This helps the sugar dissolve properly and creates a more stable meringue. Don’t dump it all in at once!
- Use gel food coloring. Liquid food coloring can make your meringue too runny. Gel food coloring is more concentrated and won’t add extra liquid.
- Bake low and slow. Keep an eye on the oven. You want the meringue to be lightly golden, not burnt!
- Patience, young Padawan! Let the tarts cool completely before serving. This allows the meringue to set and the flavors to meld.
And that’s it! Follow these tips, and you’ll be a meringue master in no time. You got this, and your *Mini Lemon Tarts* will be the talk of the town!
Ingredient Notes and Substitutions for *Mini Lemon Tart with Lilac Meringue*
Okay, let’s talk about the *ingredients* for these little beauties. Sometimes you might not have *exactly* what the recipe calls for, or maybe you just want to tweak things a bit. No worries! Here’s the lowdown on some ingredient swaps and why they work:
- Mini Tart Shells: Look, I get it. Sometimes you can’t find the perfect mini tart shells, or maybe you just want to get fancy! You can absolutely make your own tart shells from scratch (I’ll add a link to a good recipe later!). Or, if you’re in a pinch, you can use pre-made cookie cups or even make little tarts using puff pastry. Just remember that baking times might need to be adjusted!
- Lemon Curd: As I said before, you can totally use store-bought lemon curd to save time. But if you’re feeling ambitious (and have the time!), homemade is *amazing*. The flavor is so much fresher, and you can control the sweetness. If you can’t find lemon curd, you could *maybe* substitute with lime curd, but the flavor will be a bit different.
- Egg Whites: Make sure you use fresh eggs! The fresher the eggs, the better your meringue will whip up. And like I said before, make sure there’s NO yolk in those egg whites! If you’re really in a bind and have some aquafaba (the liquid from a can of chickpeas) on hand, you *might* be able to use that as a substitute, but I haven’t tried it myself.
- Granulated Sugar: You can *technically* use caster sugar (superfine sugar) instead, but it’s not a must. Granulated sugar works perfectly fine, and that’s what I always use!
- Cream of Tartar: This is important for stabilizing the egg whites and helping the meringue hold its shape. Don’t skip it! If you *absolutely* can’t find cream of tartar, you could *maybe* use a tiny pinch of lemon juice or white vinegar, but it won’t be quite the same.
- Purple Gel Food Coloring: Gel food coloring is *the best* for this recipe, because it’s concentrated and won’t add extra liquid to your meringue. If you only have liquid food coloring, use it sparingly! Start with a tiny drop and add more until you get the color you want.
There you have it! Don’t stress too much about getting everything *exactly* right. The most important thing is to have fun and enjoy the process. And trust me, even with a few little substitutions, these *Mini Lemon Tarts* will still be absolutely delicious!
Variations: Spice Up Your *Mini Lemon Tarts*
Okay, so you’ve mastered the basics, and now you want to get creative? I totally get it! Here are a few fun ideas for switching things up and making these *Mini Lemon Tarts* even more exciting:
- Different Flavors of Meringue: Instead of lilac, try a pastel pink (strawberry extract!), a sunny yellow (lemon extract!), or even a chocolate meringue (add cocoa powder *very* carefully!).
- Add Some Zest! Before you add the lemon curd, sprinkle a little lemon zest in the bottom of each tart shell. It adds a lovely burst of flavor. You could also try orange zest!
- Berry Good Time! Top your finished *Mini Lemon Tarts* with fresh berries like raspberries, blueberries, or strawberries. It’s a gorgeous and delicious touch!
- Chocolate Drizzle: Drizzle some melted white chocolate or dark chocolate over the meringue for an extra touch of decadence. Ooh la la!
- Get Nutty! Sprinkle some chopped nuts (almonds, pistachios, whatever you like!) on top of the meringue before baking for a bit of crunch.
Honestly, the possibilities are endless! Don’t be afraid to experiment, have fun, and make these *Mini Lemon Tarts* your own! That’s the best part of cooking, right?
Serving Suggestions for Your *Mini Lemon Tarts with Lilac Meringue*
Okay, so you’ve baked these gorgeous *Mini Lemon Tarts*, and now you’re wondering how to *serve* them? Well, let me tell you, there are so many fun ways to make these little treats even more special! Here are a few of my favorite ideas:
- Tea Party Time! These *Mini Lemon Tarts* are *perfect* for a tea party! Serve them with a pot of Earl Grey or English Breakfast tea, some delicate finger sandwiches, and maybe some scones with clotted cream. Fancy!
- Coffee Break Bliss: Pair them with a strong cup of coffee or a creamy latte. The tangy lemon and sweet meringue are the perfect complement to the rich coffee flavor.
- Champagne Celebration: Pop the bubbly! These tarts are a fantastic dessert for a celebratory occasion. The light, airy meringue and zesty lemon are the perfect match for a glass of champagne or Prosecco.
- Dessert Duo: Serve them alongside another light dessert, like a scoop of vanilla bean ice cream or a simple fruit salad. The combination of textures and flavors is *divine*.
- Make It a Plate: Arrange a few of the *Mini Lemon Tarts* on a pretty plate with a sprig of mint or a few fresh berries for a truly elegant presentation.
- Gift Giving Glamour: These *Mini Lemon Tarts* are perfect to give as a gift! Package them up in a cute box tied with a ribbon, and you’ve got a present that everyone will love!
Honestly, you can’t go wrong! These *Mini Lemon Tarts with Lilac Meringue* are delicious on their own, but these serving suggestions will take them to the next level. Now go forth and enjoy these little beauties!
Storage and Reheating Instructions
Okay, so you’ve made a batch of these amazing *Mini Lemon Tarts with Lilac Meringue*, and you’ve got some leftovers (lucky you!). Here’s the lowdown on how to keep those little beauties fresh and delicious:
- Storing the Tarts: The best way to store these *Mini Lemon Tarts* is in the fridge. Pop them into an airtight container. They should be good for up to 3 days! The meringue might soften a little, but the flavor will still be amazing.
- Making Ahead & Storage: The lemon curd and the tart shells can be made ahead of time, which is awesome! Just store the curd in an airtight container in the fridge for up to 3 days, and keep the baked, cooled tart shells in an airtight container at room temperature. Then, when you’re ready to serve, fill the shells with curd and top with meringue.
- Reheating (or Not!): Honestly, these *Mini Lemon Tarts* are best served cold, straight from the fridge! The lemon curd is all nice and chilled, and the meringue is still fluffy. But if you want to give them a little refresh, you *could* gently warm them in a low oven (like 200°F or 93°C) for a few minutes. Just keep a close eye on them so the meringue doesn’t brown too much!
- Freezing: I don’t recommend freezing these. The meringue doesn’t hold up well after freezing and thawing, and the texture of the filling can change a bit. Best to enjoy them fresh!
Easy peasy, right? Proper storage helps them stay fresh and tasty. But honestly? They probably won’t last long enough to *need* storing. They’re just too good!
Frequently Asked Questions (FAQ) about *Mini Lemon Tarts with Lilac Meringue*
Okay, so you’ve baked these little gems, and now you have some questions? Totally normal! Here are some of the most common questions I get about my *Mini Lemon Tarts*, answered!
Can I make the *Mini Lemon Tarts* ahead of time?
Absolutely! That’s one of the best things about this recipe! You can definitely make these *Mini Lemon Tarts* ahead of time, which is perfect for parties or busy weeks. Here’s how I do it:
- Make the Lemon Curd: You can make the lemon curd up to 3 days in advance. Just store it in an airtight container in the fridge.
- Bake the Tart Shells: You can bake the tart shells a day or two ahead and store them at room temperature in an airtight container.
- Make the Meringue Right Before: Whip up the meringue right before you’re ready to assemble and serve. That’s when it’s at its fluffiest and most beautiful!
- Assemble Just Before Serving: Assemble the tarts by filling the shells with curd and topping with meringue just before your guests arrive!
This way, you can spread out the work and have fresh, gorgeous *Mini Lemon Tarts* ready to go whenever you need them!
How do I store leftover *Mini Lemon Tarts*?
If, and I mean *if*, you have any *Mini Lemon Tarts* leftover (which is rare in my house!), you’ll want to store them properly so they stay delicious. Here’s what I do:
- Refrigerate: Store the tarts in an airtight container in the refrigerator. This will help them stay fresh longer.
- Eat ‘Em Up! They should be good for about 2-3 days in the fridge. The meringue might soften a little, but the flavor will still be amazing!
- Don’t Freeze: I don’t recommend freezing these. The meringue doesn’t freeze well, and the texture might change. Best to enjoy them fresh!
- Gel Food Coloring is Best: I highly recommend using gel food coloring. It’s concentrated, so you don’t need to use as much, and it won’t make your meringue runny.
- Liquid Food Coloring Works, Too: If you only have liquid food coloring, that’s okay! Just use it sparingly, a drop or two at a time, until you get the color you want.
- Experiment! Have fun and try different colors! Pink, blue, green… whatever makes you happy!
- Make Your Own: You can totally make your own tart shells from scratch! There are tons of easy recipes online.
- Use Mini Cookie Cups: Those little pre-made cookie cups are a great substitute! Just fill them with the lemon curd and top with meringue.
- Puff Pastry Tarts: Cut puff pastry into circles and bake them until golden brown. Then, fill them with lemon curd and meringue.
- Go Big! You can make one big lemon tart instead of mini ones. Just use a regular-sized tart pan! You’ll need to adjust the baking time accordingly.
- Calories: About 150.
- Sugar: Around 15 grams.
- Sodium: About 20mg.
- Fat: Roughly 8 grams.
- Saturated Fat: About 4 grams.
- Unsaturated Fat: Around 3 grams.
- Trans Fat: 0 grams (yay!).
- Carbohydrates: About 20 grams.
- Fiber: Around 0 grams.
- Protein: About 2 grams.
- Cholesterol: Around 15mg.
- Total Time: 30 minutes
- Yield: 12 mini tarts
- Diet: Vegetarian
- 1 package pre-made mini tart shells
- 1 cup lemon curd
- 3 egg whites
- 1/2 cup granulated sugar
- 1/4 teaspoon cream of tartar
- Purple food coloring (gel)
- Preheat oven to 350°F (175°C).
- Fill each tart shell with lemon curd.
- In a clean bowl, beat egg whites and cream of tartar until soft peaks form.
- Gradually add sugar, beating until stiff, glossy peaks form.
- Gently fold in purple food coloring.
- Spoon or pipe meringue onto lemon curd.
- Bake for 8-10 minutes, or until meringue is lightly golden.
- Let cool completely before serving.
- You can make your own tart shells and lemon curd if you prefer.
- Adjust the amount of food coloring to achieve your desired lilac shade.
- Store leftover tarts in the refrigerator.
- Prep Time: 20 minutes
- Cook Time: 10 minutes
- Category: Dessert
- Method: Baking
- Cuisine: French
- Serving Size: 1 tart
- Calories: 150
- Sugar: 15g
- Sodium: 20mg
- Fat: 8g
- Saturated Fat: 4g
- Unsaturated Fat: 3g
- Trans Fat: 0g
- Carbohydrates: 20g
- Fiber: 0g
- Protein: 2g
- Cholesterol: 15mg
Proper storage is key to keeping those *Mini Lemon Tarts* tasting amazing for as long as possible!
Can I use different food coloring for the meringue?
Of course! That’s the fun part! You can totally use different food coloring to create any color meringue you want! Here’s what I’ve learned:
Go wild with the colors! It’s your chance to add your own personal touch to these *Mini Lemon Tarts*!
What if I don’t have mini tart shells?
No mini tart shells? No problem! Life happens, and sometimes you have to improvise! Here are a few ideas for alternative options:
Don’t let the lack of mini tart shells stop you! Get creative and have fun! The most important thing is the delicious lemon and meringue combination!
Nutritional Information
Okay, so here’s the deal with the nutrition facts! Keep in mind that these are just *estimates*. The actual numbers might be a little different depending on the *exact* ingredients you use, and the brands you choose. But hey, it gives you a general idea, right?
This information is based on one *Mini Lemon Tart*:
Remember, this is just a rough guide! Enjoy those *Mini Lemon Tarts* in moderation, and don’t worry too much about the numbers. It’s all about enjoying a delicious treat!
Print
Make 10 Perfect Mini Lemon Tart with Lilac Meringue
Description
Delightful mini lemon tarts topped with a beautiful lilac meringue.


